
Converting standard Opt Lasers XF into XF+
So here it is. Long waited XF+ conversion kit for my older PLH3D-6W-XF laser module. I will show you how i upgraded the old module to be able to use a new uSpot lens and a new XF lens adapter in combination with Opt Lasers new High pressure air assist nozzle.
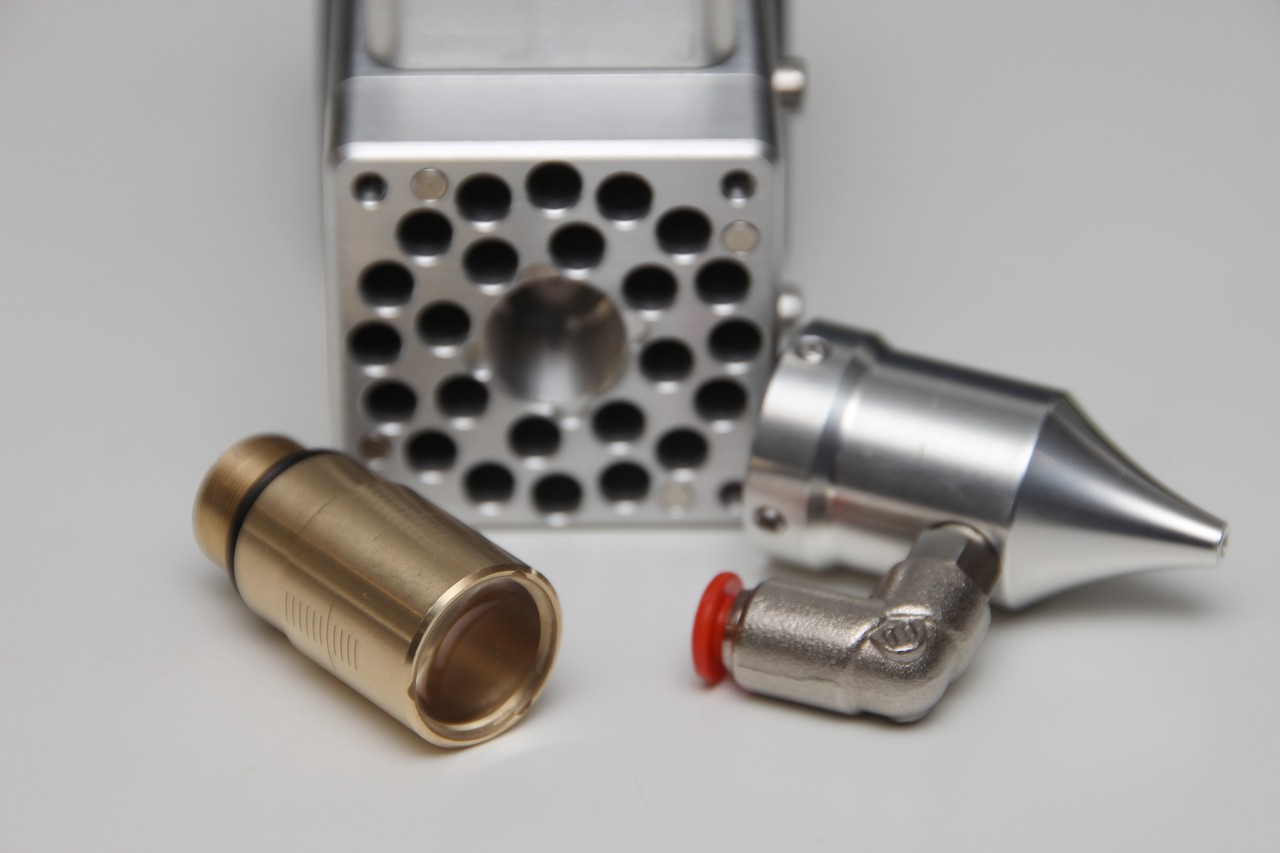
The whole process began back in may 2020 when I ordered the Opt Lasers PLH3D-6W-XF from Nettiverstas. Its of course possible to order directly from Opt Lasers also! I started to talk with Opt Lasers support and soon i realized my self in the process of testing an air-assist prototype using 3D prints and 3d prints in combination with machine aluminum nozzles.

I also design a prototype based on the Opt Lasers magnetic nozzle but it didn’t work as well as the angled nozzle. Conclusion of why, is that the air stream and laser beam was not 100% aligned…
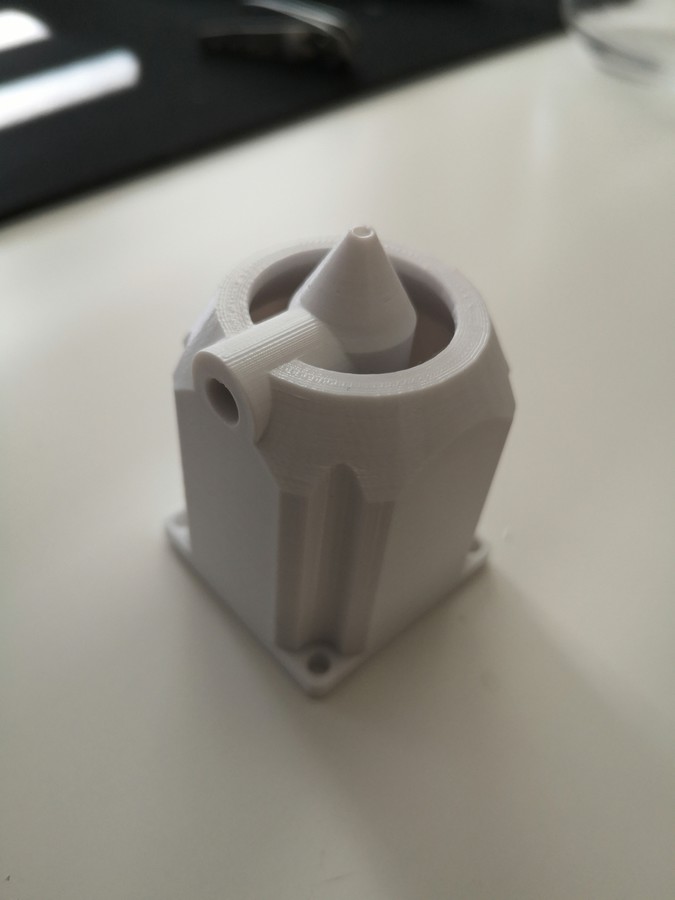
The cooling air is directed on the outside of the pressurized air-assist nozzle. The whole print was fixed to the heat sink of the laser using a rubber sealing around the laser lens to prevent air escaping the nozzle from other places than the tip of the nozzle.
These aluminum nozzles didn’t give as good results as the angled air-assist nozzle that I designed but this was mainly because I could align or calibrate the 3d print as precise as needed in order to get everything 100% aligned.
When I got everything as right angled as possible, I got almost as good results as with the angled nozzle. The prototyping took in whole something like 2 months with many free days of course 🙂 and all findings was reported to Opt Lasers development team and they came out with something that is way more cool than what I was expecting.

High pressure air assist nozzle is now available from Opt Lasers
Upgrade kit available from here
Disassembling and Assembling parts
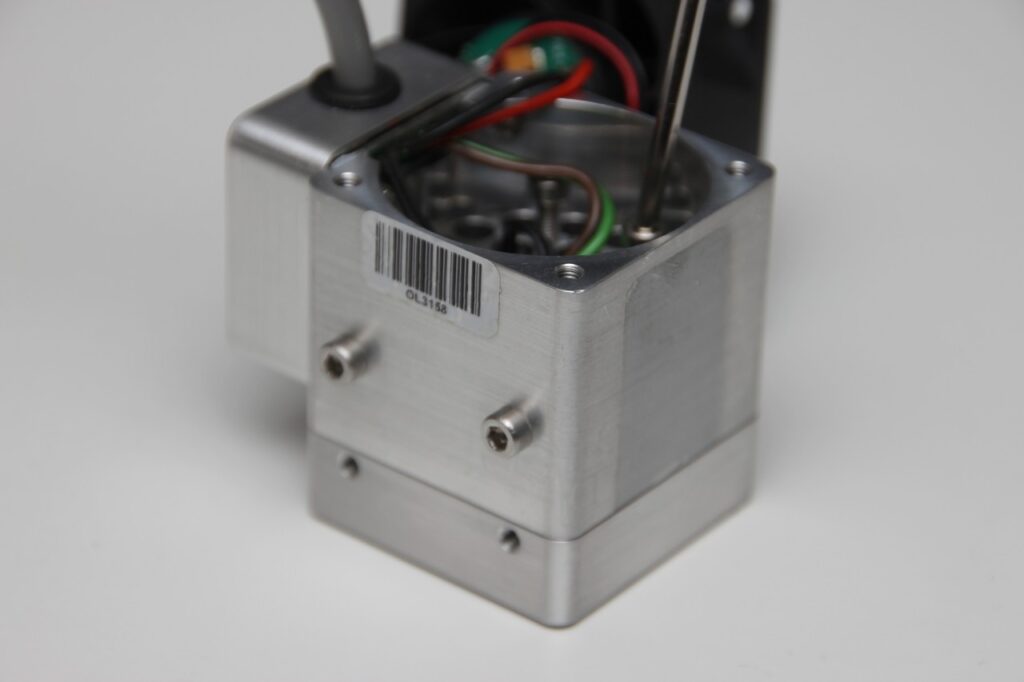
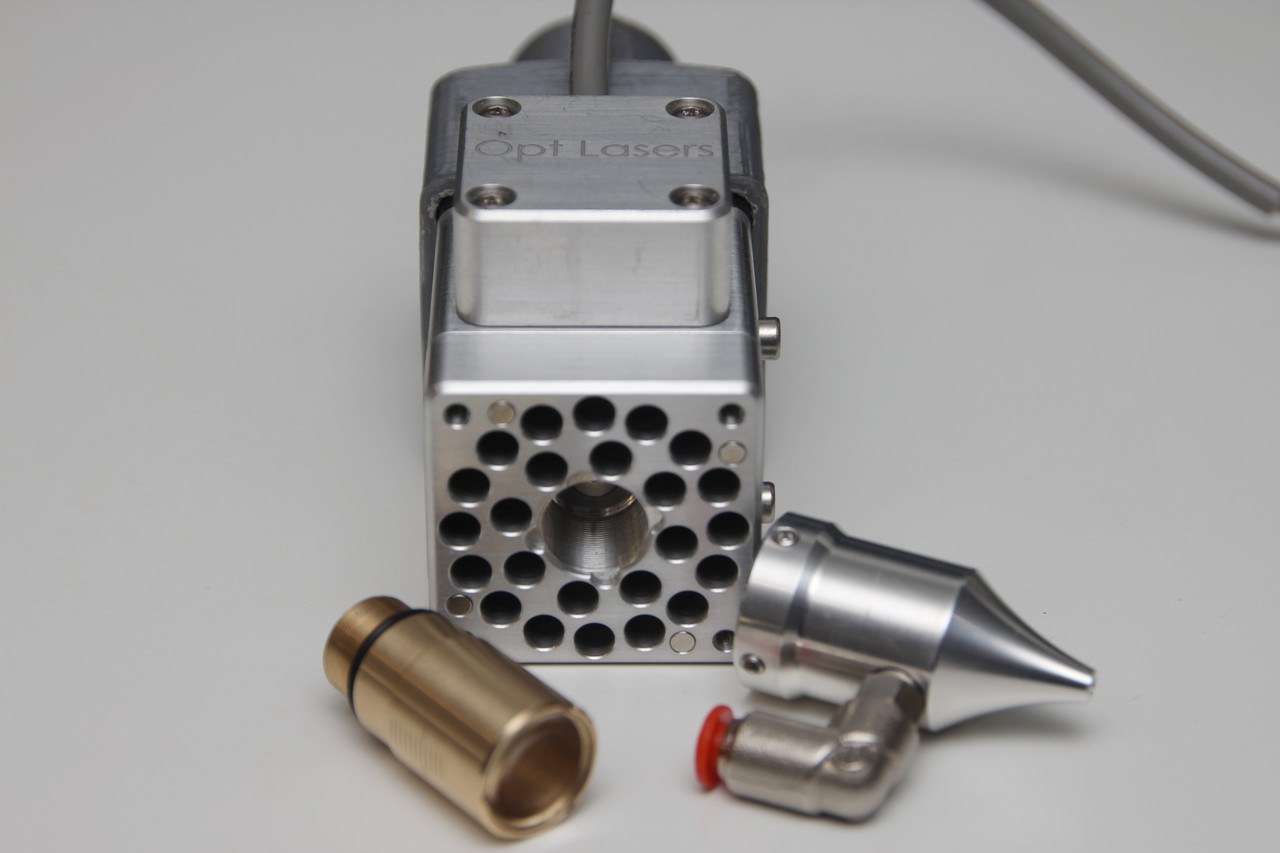
This was what i started with and first steps was to remove the magnetic nozzle and dissassembling the whole package in order to change the lower part of the aluminum heat sink body.

Open up the magnetic nozzle screws Magnetic nozzle dissassembled Open up cooling fan screws.

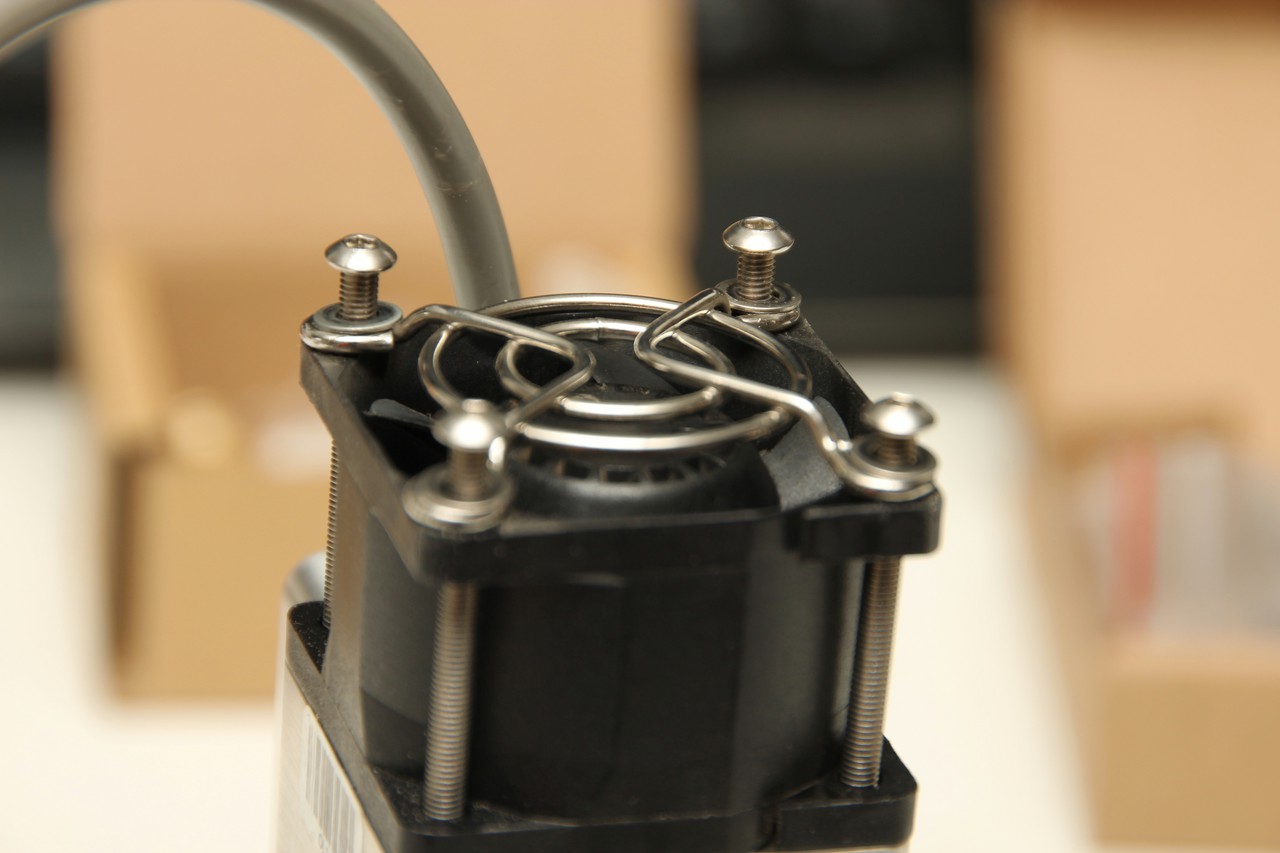
To access the screws of the bottom part of the laser module body, the fan needs to be separated from the heat sink. Underneath the fan there is 4 screws that must be opened.
Screws under the fan Removing old labels Disassembled laser module body

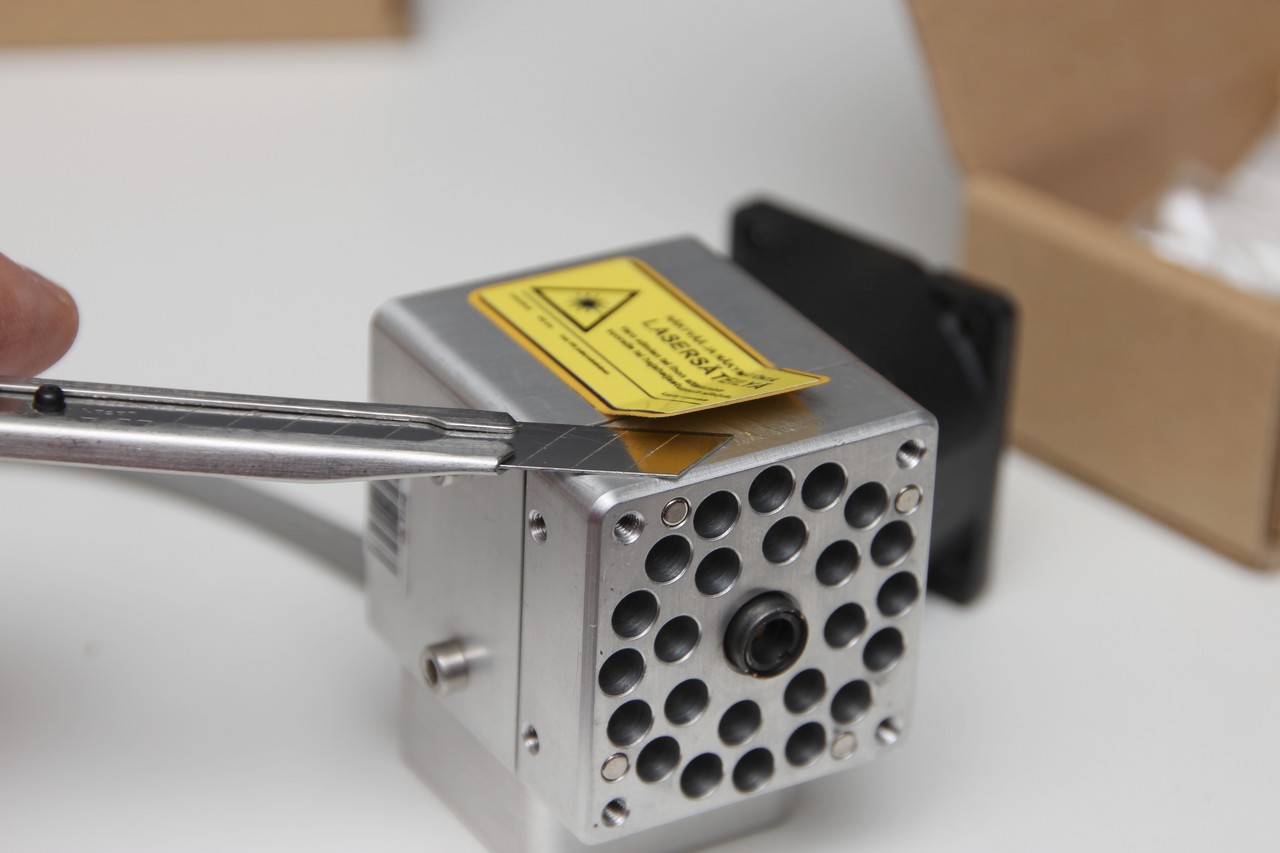
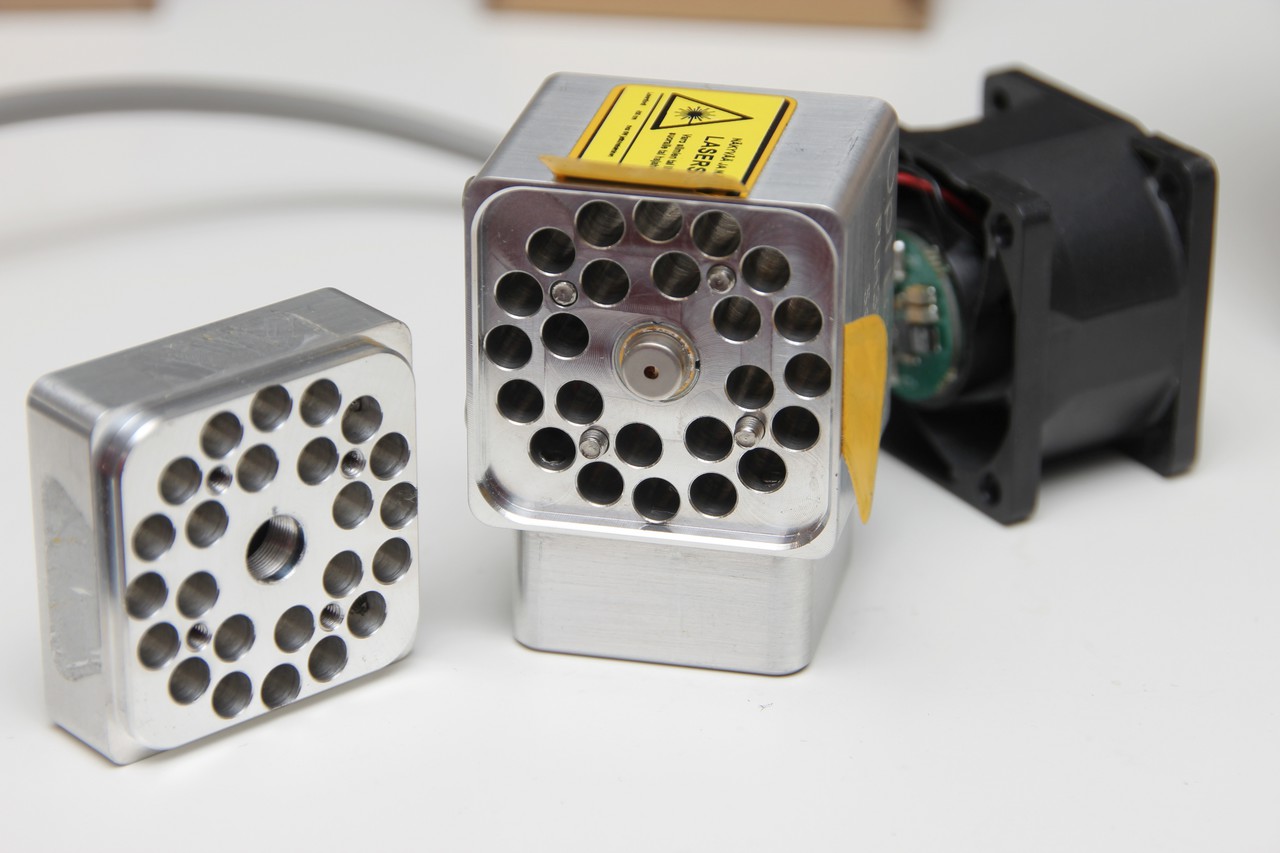
When disassembling the lower part, you will see the diode. Try avoiding to touch the diode component since its the base of the whole package. If its dirty, the effect of laser will be affected.

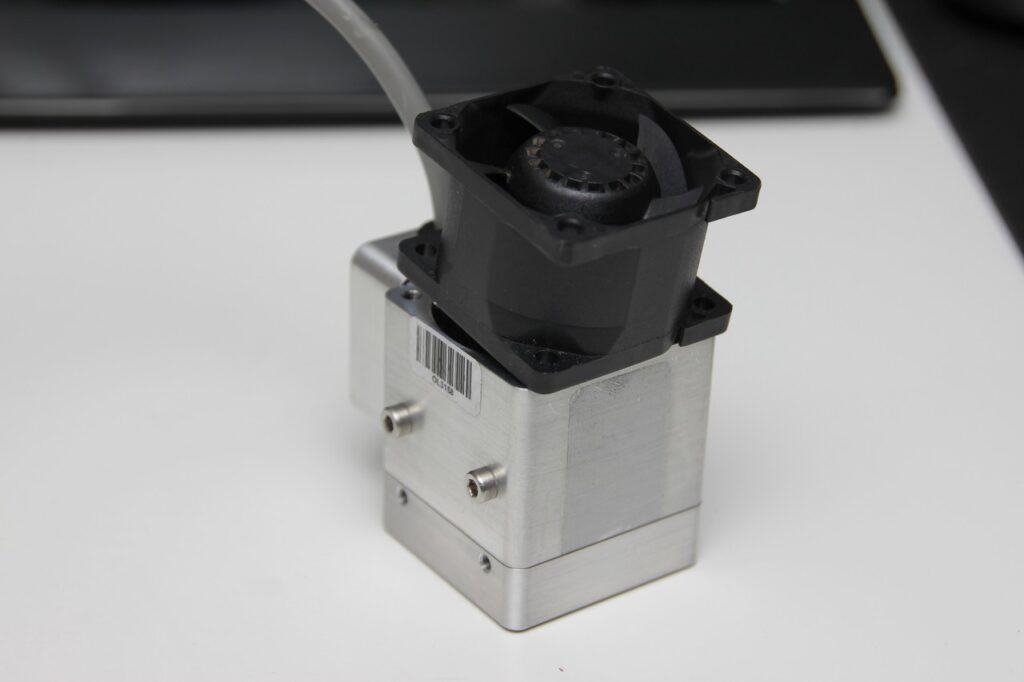
The new lower body part is needed (Order it from here) in order to be able to attach the uSpot lens and the new XF lens adapter. These 2 lenses can be used in combination with the new High pressure air assist nozzle. When attaching the new lower body, make sure the laser module mounting screws are aligned on the same side of the main body. Tighten the screws so that the lower body part is firmly in place. After this, gently tighten the fan screws. (Do not overtighten the fan screws. Too tight may break the fan upper edges)
Assembling the lower body part. Assembling the fan Gently tighten the screws of the fan
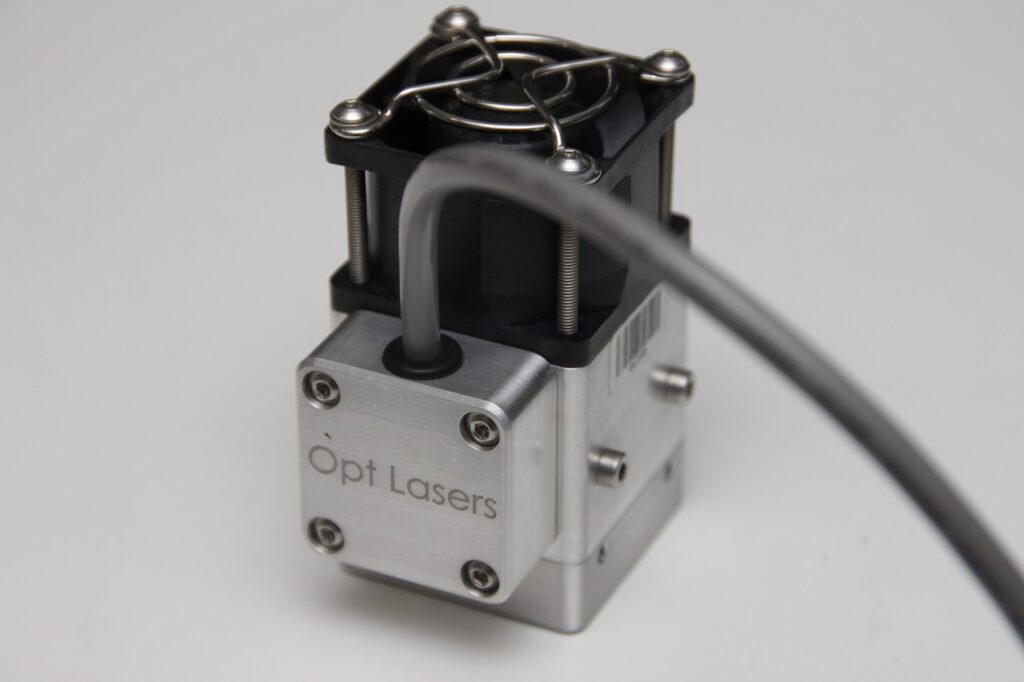
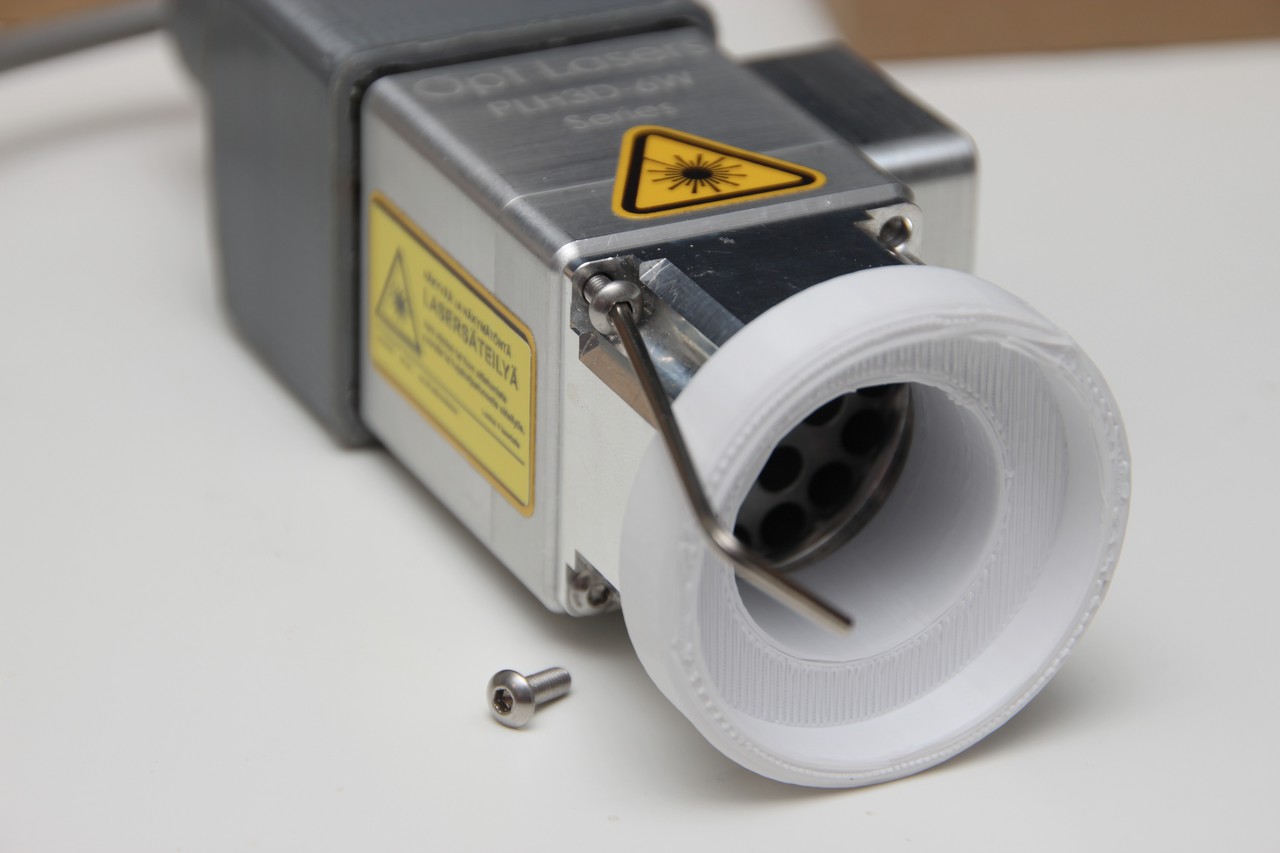
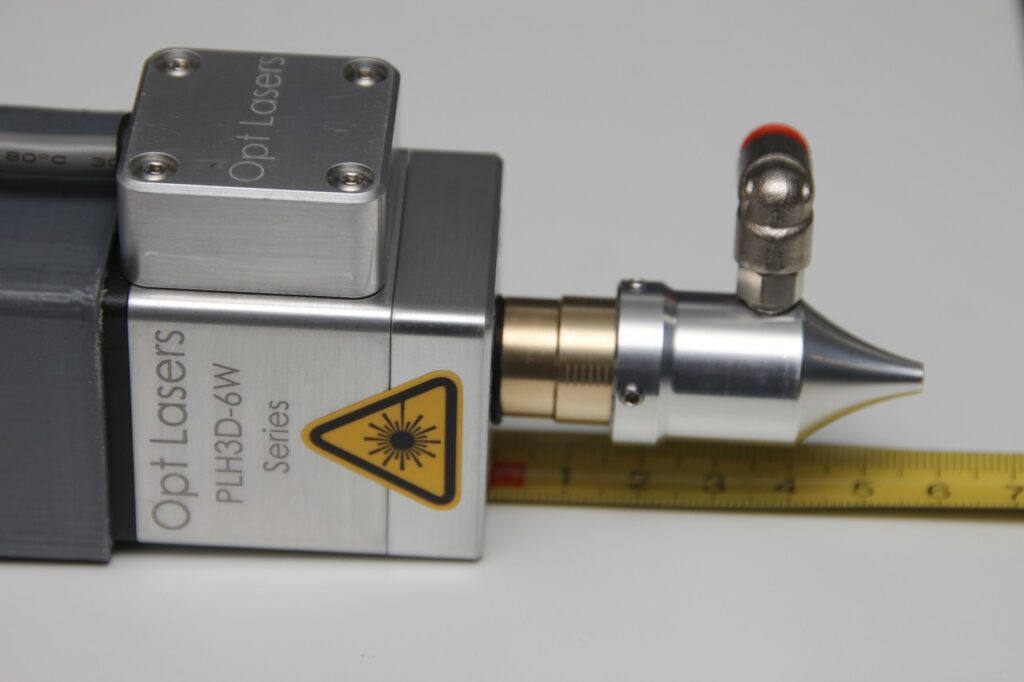
After assembling the module back to its original shape, the new lenses can be mounted. In this case the uSpot lens was mounted.
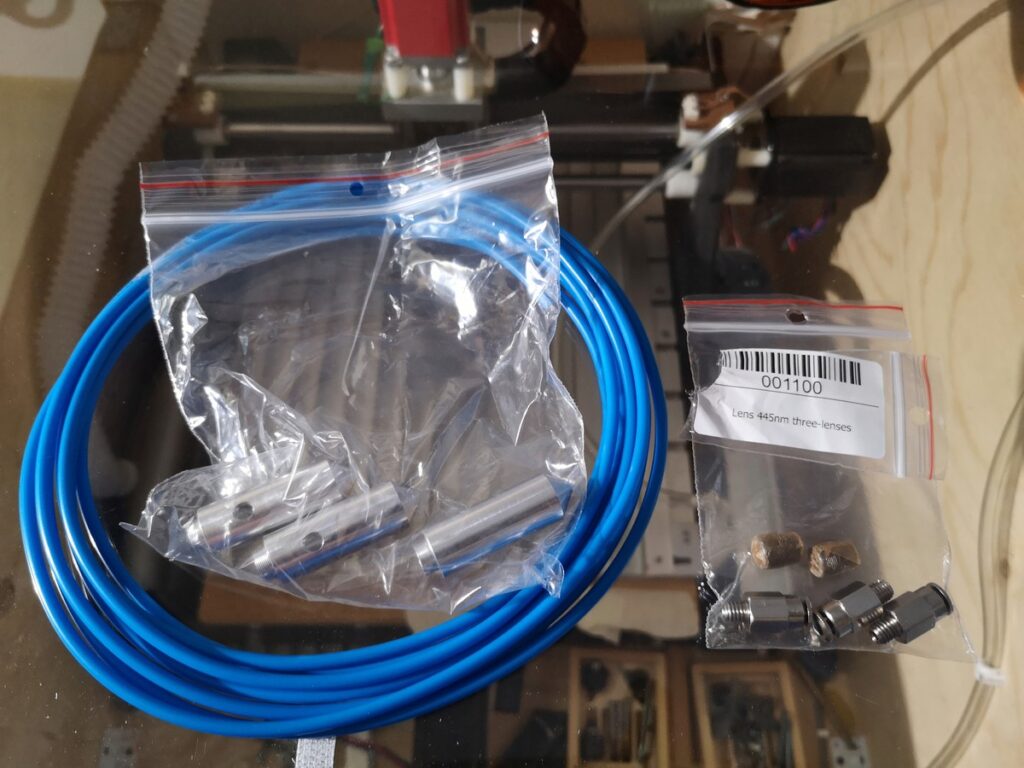
uSpot lens + High pressure air assist nozzle uSpot lens + High pressure air assist nozzle
The uSpot lens was mounted by screwing it until the rubber sealing was squeezed against the heat sink body. To achieve 60mm focal length, screw the uSpot lens until you feel small resist. When you start feel the resist due to the rubber sealing, rotate it ~½ turn more. Make sure the lens is firm and does not move. If it still feels a little loose, rotate until it doesn’t feel loose anymore.

After mounting the uSpot lens the High pressure air assist nozzle was mounted. I slided it at the long marking seen on the uSpot lens. In this way on my setup the nozzle tip will be around 3mm away from the work surface when focal length of the uSpot lens is 60mm.
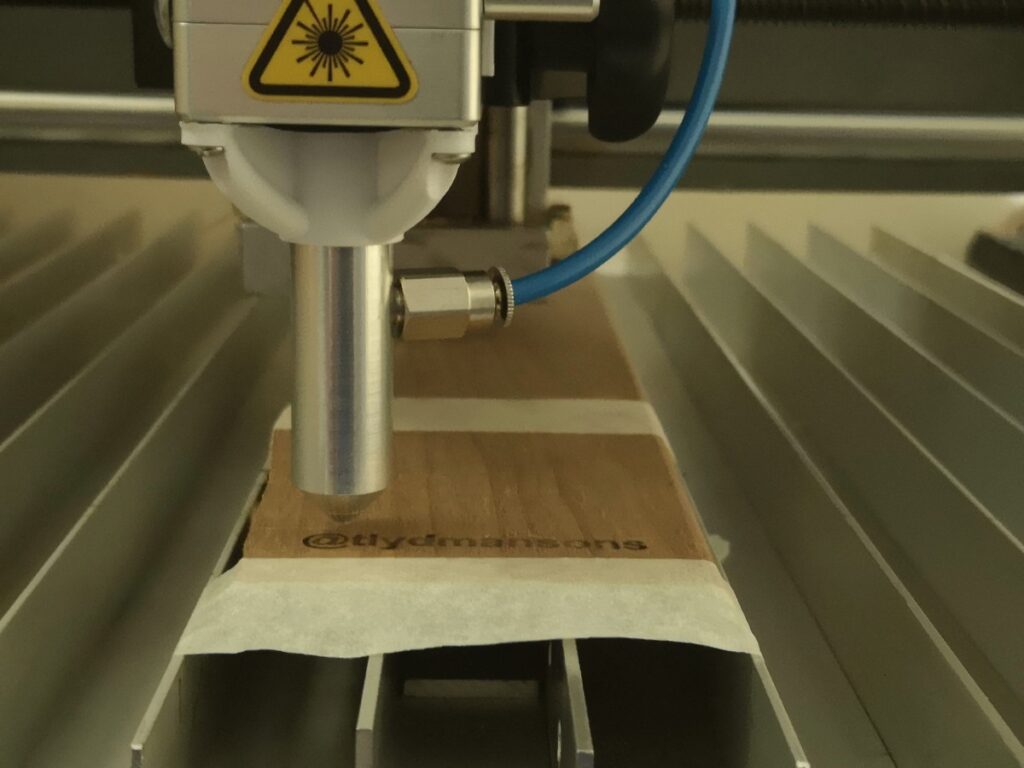
measuring the clearance measuring the clearance Assembled High pressure air assist nozzle on uSpot lens
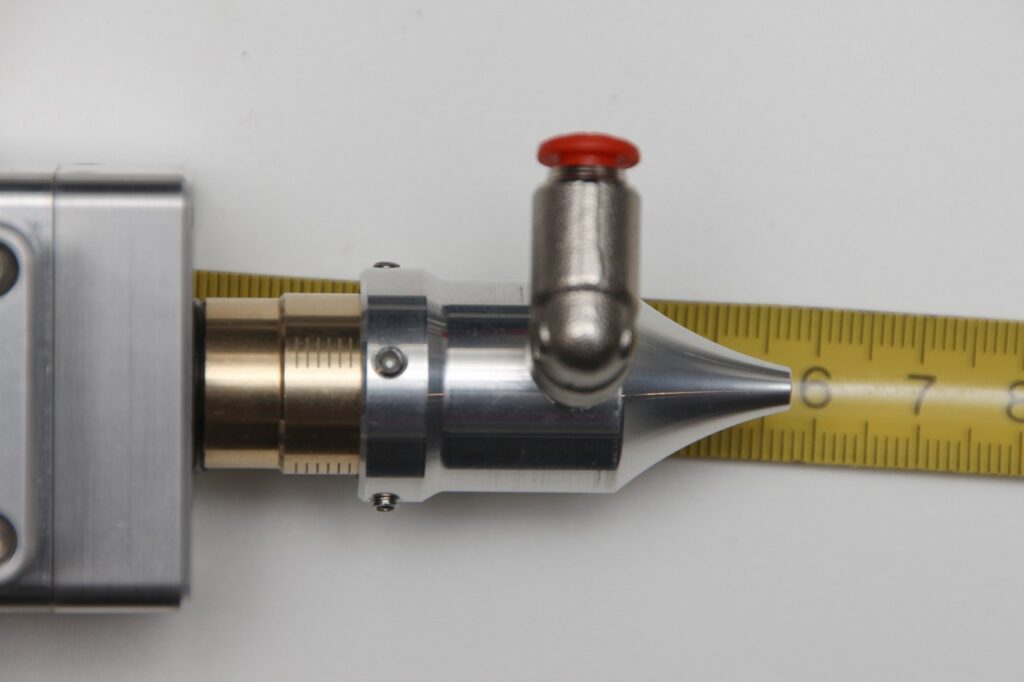

Now that the laser module is re-assembled with new parts. Its time to get back to the workshop and test what the best clearance measure is.
If you want to be informed on new blog posts. On mobile you can find the widgets below this text and on PC you can find the widgets if you navigate and scroll up to the beginning of this post.

