
Designing the Y-Axis ballscrew bracket mount plates
A slight re-design is needed from the y-axis endplates. The end plates are to be replaced with mount plates for the BK12 brackets that are on top of the RatRig 40160 aluminum profiles. The mount plates will be made out of Al-Men aluminum bars.
In order to get the Y-Axis BK12 ballscrew bracket aligned with the gantry plates that carry X-axis, some dimensions needs to be found out.
To get the rail and block total width, specs of the rails and blocks needed to be investigated. They will be found from AliExpress page.

Height of rail + block
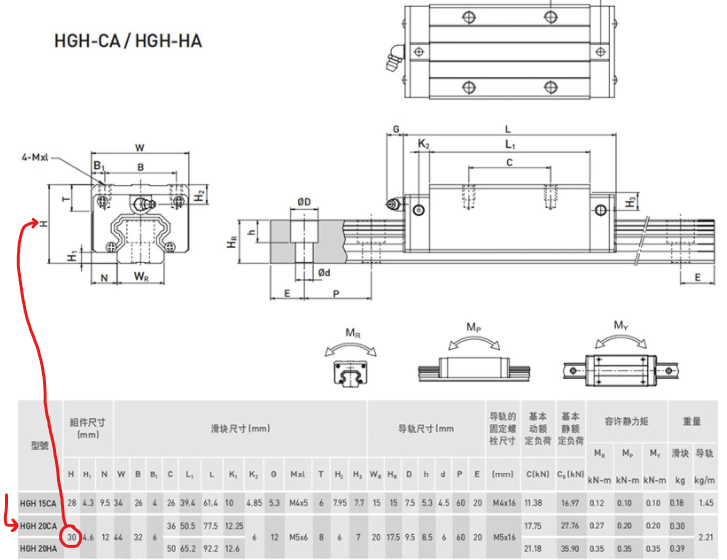
This height is needed to be able to design the BK12 ballscrew bracket mount plates so that they are aligned with no additional spacers needed.
Not marked in image, but also the rail needs to be considered.
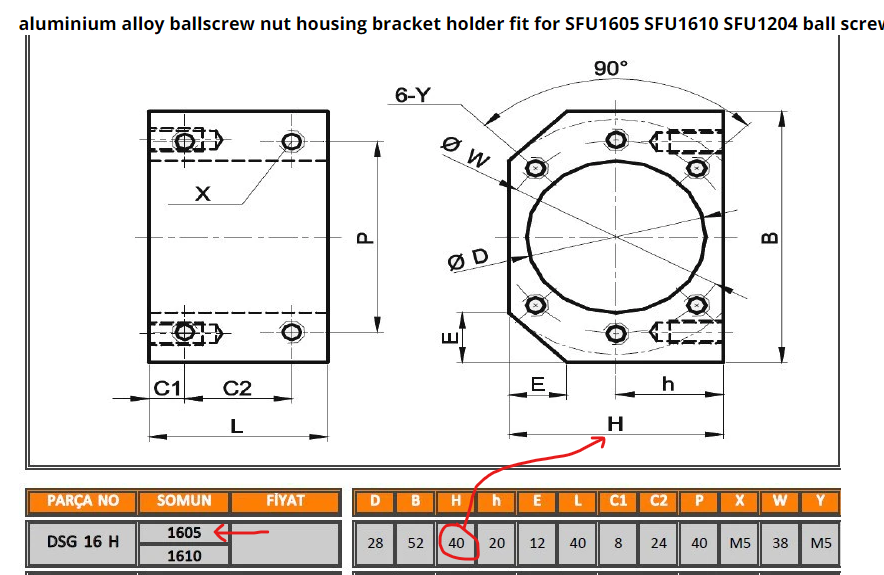
Now that we know the rail + block height to be 30mm and the profile width that is 40mm and the BK12 bracket width (60mm) and last but not least, the nut housing to be 40mm -> We should be able to design the Mount plate.
Nut housing specs
Taking all dimensions into Vectric Cut2D, the design looks like shown below.
Y-axis bk12 mount plate
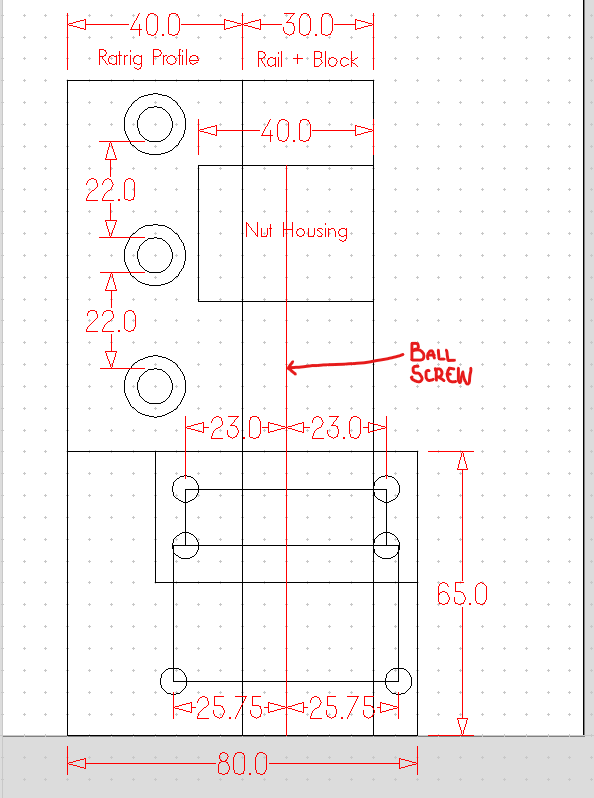
The desing is maybe a little confusing but anyways the mounting plate will be L shaped when finished. You can imagine the result by erasing the rail + block rectangle and the nut housing rectangle.
There is still things to be considered, like does the nut hosing interfere with the mount plate part that is 40mm wide. According to 3d Models there around 1mm of gap 🙂 So plenty of play indeed!
Also the back side BK12 counter bracket will need a slightly different design since the counter bracket is slightly different compared to the front bracket.
I guess next up will be some plywood prototypes of the mount plates.
